How to Survive the Dreaded Middle Seat

“What the 28F?” was my first thought when I saw where I would be sitting on an upcoming 14-hour flight. Here is what I’ve learned about how to survive long flights in lame seats.

“What the 28F?” was my first thought when I saw where I would be sitting on an upcoming 14-hour flight. This wasn’t any ordinary middle seat—no, it was the middle seat of the middle row. Instantly, my mind went into CIA operation-mode. How was I going to get out of this? How could I use my charm, con skills, and persistency to finagle a better seat? Alas, the answer was I didn’t.

So instead of telling you my success story, here is what I’ve learned about how to survive long flights in lame seats.

Step 1: Accept your fate. Sure, you can (and should) check in online 24 hours in advance to see if anything has opened up; try to get to the airport super early and hope for an exit row seat; and ask the gate agent if someone with a better seat miraculously didn’t show for the flight. However, what you should also be doing is preparing.

Step 2: Prepare. I kept my bag under my seat so that I could be in reach of anything I might need right away. This includes neck pillow, eye mask, compression socks, headphones, tissues, hand and face lotion, medicine bag, and water. Yes, it’s overkill. Yes, it’s worth it.

Step 3: Make nice. When you board the plane, give a smile or nod of greeting to the poor soul you are going to make get up multiple times in the duration of the flight. Having her/him on your side is not a bad idea. If your aisle companion speaks English, perhaps ask if s/he prefers you gently wake or step over if s/he is sleeping when you need to get up. Some kinder folks than myself may patiently wait for their aisle mate to wake; however, I don’t have much shame in asking people to move. It’s the risk they took when they booked the aisle seat. Plus, as an aisle person myself, I will always happily move for anyone inside the row. Therefore, I choose to be apologetically nice over polite.

Step 4: Get “comfortable.” In order to avoid throwing too many elbows at your neighbors during the flight, set up camp when you first sit. In the seatback pocket, put your reading materials, water, headphones, tissues, and any other vitals you want to quickly access.

Step 5: Pace yourself. If not already obvious from Step 3, I like getting up, walking around, and generally doing anything other than sitting in that uncomfortable seat. If you’re the same, then take advantage of any opportunity to get moving. If your aisle companion gets up to use the restroom, either use the restroom yourself or just stand in the aisle, soaking up those glorious moments that you can get vertical. If you do need to use the restrooms, stand for a while afterwards and do a few stretches.

Step 6: Celebrate. Nothing can bring you down quite like your own bad attitude. Therefore, I don’t just cheer for my survival at the end of the flight, I celebrate the steps in between. Made it through eight of the 14 hours? Well done, over half way there. Nice job getting a nap in without falling on anyone. That was soooo impressive how you got out your laptop without hitting your dozing neighbor’s leg. And, then…finally…Congratulations, you made it!

The moral of this story is get your seats early. But the lesson is that when you inevitably draw the short straw in life, do what you can to prepare for the situation and celebrate the little victories. It’s all about what you make of it.

Earning Miles for Flights

Traveling abroad doesn’t have to burst your budget. Airline and hotel credit cards can provide mega deals on your trip all for the price of using their card for a few months.

Traveling abroad doesn’t have to burst your budget. Airline and hotel credit cards can provide mega deals on your trip all for the price of using their card for a few months.

Banks and airlines are joining together more and more to reward your spending. After years of cash back offers, banks have realized that by combining their services with airlines, they can give flights for much less than forking over hard cash. Here, you’ll find summaries of the credit cards and their mileage deals that correspond with the largest U.S. airlines. Make sure to check each bank’s website for the full details; at times, they will run special deals with added miles.


– Capital One Venture Card –

  • Annual fee: $59; waived the first year
  • Bonus miles: 40,000
  • Spending requirement: $3,000 in the first 3 months
  • No International Fees

This is my all-time favorite credit card. It gives 2 miles per dollar spent, and you have flexibility to choose which airlines you use those miles on. You can either use your accumulated miles to purchase a flight through the Capital One site, or you can get reimbursed for any travel costs that you purchase with the Venture card (flights, hotels, taxis, etc.). The Venture card is always top of the rating lists for most rewarding. Nor does it hurt that there aren’t international transaction fees.

– Citibank AAdvantage Card –

  • Annual Fee: $50 – $95; waived the first year
  • Bonus Miles: 25,000 – 30,000
  • Spending requirement: $750 – $1,000 in the first 3 months

This credit card has a few options to choose between, and you will likely want the Gold World Elite or Platinum Select World Elite. Citibank partners with American Airlines to bring sign up bonuses of 25,000 miles and 30,000 miles for the Gold and Platinum cards, respectively. Gold World Elite, you need to spend $750 in the first 3 months, and you get 1 American Airlines mile per dollar spent. The Platinum Select World Elite gives you 2 miles per dollar spent, and you receive the 30,000 miles after spending $1,000 in the first 3 months.

– Chase United MileagePlus Explorer Card –

  • Annual Fee: $95; waived the first year
  • Bonus Miles: 50,000
  • Spending requirement: $3,000 in the first 3 months
  • No International Fees

The Chase United card gives some added bonuses when flying with United including a free checked bag, priority boarding, and two United Club passes each year. With the card, you earn 1 mile per dollar spent, and 2 miles per dollar spent on United Airlines purchases. The annual fee is steeper, but it’s well worth the whopping 50,000 United Airlines miles which can get you an international roundtrip for the cost of the taxes.

– Delta SkyMiles Credit Card –

  • Annual Fee: $95; waived the first year
  • Bonus Miles: 30,000
  • Spending requirement: $1,000 in the first 3 months
  • No International Fees

Delta Airlines has partnered with American Express to bring you two credit card options, Gold and Platinum. For the average user, the Gold card is recommended, with perks of a free checked bag, priority boarding, and access for two people to the Delta Sky Club. You can also earn a $50 credit to your account if you make a Delta purchase in the first three months. One helpful tip is that your Delta purchase can be in the form of a gift card. That way, you don’t have to book any flights if you’re not ready to travel just yet. Keep in mind that 30,000 miles tends to not get you as far as it would on American or United Airlines.

– Southwest Rapid Rewards Card –

  • Annual Fee: $69
  • Bonus Miles: 40,000
  • Spending requirement: $1,000 in the first 3 months
  • No International Fees

Southwest Airlines offers its rewards card through Chase Bank. As Southwest continues to grow its international destinations, the miles will be certain to pay off. I greatly respect Southwest as an airline, and its free checked bag and no change fees apply to everyone, not just cardholders. Your mileage points won’t have an expiration date as long as you still have an active credit card.


At the end of the day, choose the card that works best for you. If your goal is to gain an international trip out of your card, go with one of the first three options above. If you are looking at domestic or Caribbean travel, Southwest and Delta are good choices. Keep in mind, as well, the partners for each of these airlines. United is strong almost worldwide; Delta has good partnerships with Africa and Asia; and American partners with many airlines in Central and South America as well as Western Europe.

A Prepared Hiker is a Happy Hiker

No matter the length of your planned hiking trip, some simple preparations can help you enjoy the journey so much more.

image1
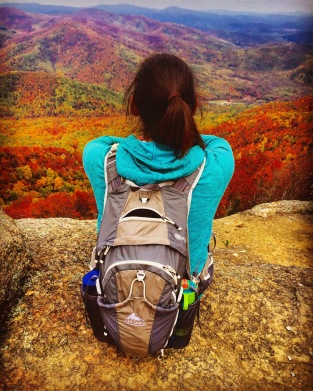
You’re hiking through the woods, surrounded by majestic mountains, a trickling brook, and trees filled with the colors of Fall. But none of that seems to matter. Instead, you are annoyed by the mosquitoes biting you in places you didn’t even know you had, thirsty because you ran out of water back at Mile 2, and burnt to a nice lobster red. No matter the length of your planned hiking trip, some simple preparations can help you enjoy the journey so much more.

First, I cannot stress enough, bring more water than you think you will need. Some people are thirstier than others, so know yourself, and even better, know your hiking partner too because guess whose water bottle they’re going to be eyeing if their supply runs out. This comes from experience of a family hike we took in Hawaii back when I was young. My cousin and I didn’t know the full extent of just how desperate our situation was at the time, but now, that hike is forever known as the infamous “ran out of water hike” of 2001. While the trip itself was spectacular and filled with so many wonderful memories, that hike where we ran out of water comes up five times more often than any other memory–you do the math on what sticks with you. DCIM100GOPROGOPR0722.

Second, while fashion is by no means important to the birds and other wildlife that surround you during your hike, it does matter what you wear. Pure cotton is your enemy on hikes. It retains moisture longer, which means sweat or rain plus wind can leave you cold and damp for a very long time. Pay attention, as well, to what fabric your socks are; a cotton and wool mixture is a good option. And speaking of socks, on a longer hike, I like wearing two pairs for extra cushion and keeping any rain or puddle water out for just a little longer. Of course, having thick hiking socks on can be a little bulky, which is why a good shoe store will always recommend going a size larger than usual.

Version 2
Don’t let the sunlight fool you. By the end of this hike, I had on a long-sleeve shirt, a light jacket, a rain jacket, hat, and gloves.

When in a climate where the weather can change quickly, layers are you friend. This might include a hat (baseball cap for the sun or beanie for cold), gloves, scarf, light jacket, rain jacket, sunglasses, etc. Sure, you could get lucky and not need your extra gear, or you could get unlucky and unexpectedly be stuck in the rain for three hours.

Third, have your backpack full of goodies that are there for whatever need comes up. A travel packet of tissues, hand sanitizer, Bandaids and Neosporin are my go-to medical kit. Also, if you are anything like me where if there is one mosquito within 100 miles, you get ten bites, some packets of mosquito repellent wipes are an easy way to make sure you cover all showing skin. Lastly, don’t forget snacks! Nothing is worse than being hungry on a hike (well, except for blisters, thirst, sunburn…why do we do this again?). The usual recommendations of granola bars and trail mix are still the top items. I also throw in a natural fruit bar for a quick sugar boost.

With your bag packed, water bottle filled, and hiking boots laced up, you’re ready to enjoy the journey.